The index closely related to the search feature in Windows Exlporer. With indexed locations, we can search any files or folders in those locations faster than non-indexed locations (read the previous article about "
Windows 7 Search Index"). But sometimes in indexed location, the index cannot find files or folders that we looking for, although we are sure the files exist in that location. Over the time, the locations we have used have a lot of changes, such as copying and moving some files in it. So the index would change. In this case, we have to manually rebuild the index to get more accurate results (or we can call it to update the index).
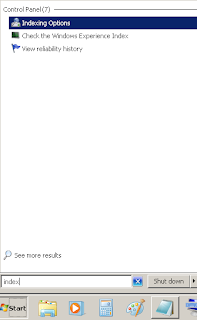 |
| Indexing Options |
Steps How to Rebuild the Index in Windows 7 and Windows 8
- First, run the Indexing Options. Click Start > just type index in the Start search box (in the other way, click Start > Control Panel > click Indexing Options icon).
- On the Indexing Option window, click Advanced button.
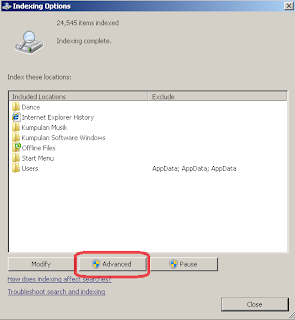 |
| Click Advanced |
- On the Advanced Options window, click Rebuild button (as shown in the picture below).
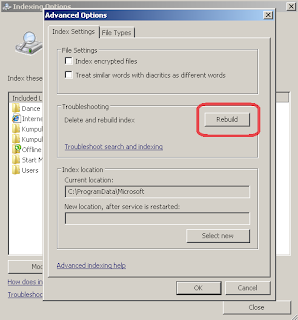 |
| Rebuild The Index |
- A few moments later, will appear a confirmation window. Click OK button.
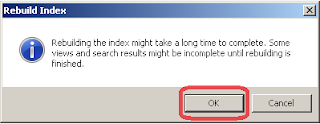 |
| Confirmation Window |
- After that, the index is being rebuilt. Click Close to close the window.
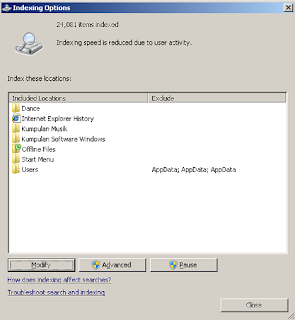 |
| The Indexing Process is Run |
The Things That Should be Known When Rebuild Index Windows 7 and Windows 8
- Rebuilding the index may require a lot of time to complete and searches results might be incomplete until the index have been finished.
- When the index has completely rebuilt, the Indexing Complete notice will appear (as shown as the picture below).
- Time required to rebuild the index depends on the user activity. The less activity in PC, the faster index rebuilding process
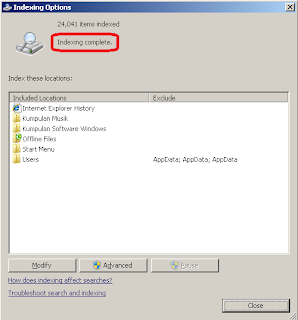 |
| Indexing Complete |
.
Rebuild the search index in Windows 7 and Windows 8 is very simple to do. We can do this process once a month to keep the PC's performance. Hope this
computer tip helps!


No comments:
Post a Comment